
Help Centre
How to configure a Lookbook package
Sometimes you want to offer a complete set where the visual style is strictly curated, such as a suit (Jacket + Trousers) or a team uniform. In these cases, you want to lock the color matching while still allowing the customer to select the correct size for each piece.
The Lookbook is similar to the Mix and Match package, but with stricter control over the aesthetics. While a Mix and Match allows the customer to change colors freely (e.g., swapping a white tee for a black one), the Lookbook enforces your curation. You define the color for each item, and the customer only selects their size.
Like the Mix and Match package, items in a Lookbook are added to the shopping cart as separate items.
Why use a Lookbook?
- Curated style: Perfect for sets where you want to dictate the exact look. Whether it is a matching suit or a styled combination like a blue jacket with khaki pants, you ensure the customer buys the specific color pairing you designed.
- Simplified shopping: Reduces decision fatigue. The customer buys the "Blue Suit Look" and only needs to worry about fit, not color coordination.
- Multiple colorways: You can create variants of the Lookbook itself (e.g., "Navy Suit" vs. "Charcoal Suit") to offer the same set in different pre-defined color combinations.
Step 1: Create the Product and basic settings
The first step is to create the container for your curated look.
- Click "+ Create new product" in the top right corner of the product list.
- Select Lookbook from the list of product types.

Once created, configure the tabs to define the product:
- In the Settings tab. Assign a name and product number, and set the state to "Ready for sale".
- In the Variants tab. This differs from other packages. If you want to offer this look in multiple colorways (e.g., a "Navy" option and a "Black" option), you should create variants here. If it is a single unique look, you can stick to the default.
- In the Enrichment tab. Upload a high-quality image of the complete look and add a description.
- In the Categories tab. Assign the lookbook to the relevant category.
- In the Prices tab. Set the price manually. This is typically the sum of the items.
Step 2: Define the contents
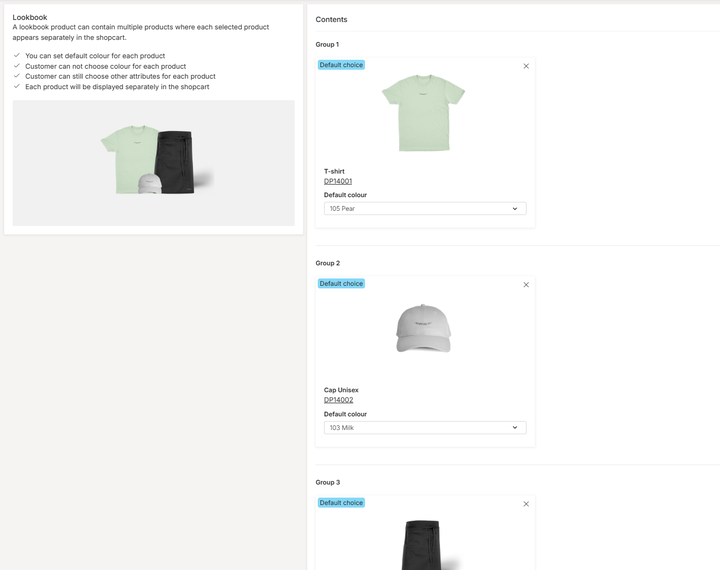
Navigate to the Package contents tab to build the look. Adding a product automatically places it in its own distinct Group.
- Click "+ Add content" and select the first item.
- The product is added to "Group 1". You must select a Default colour. Crucial: Unlike Mix and Match, this selection is fixed. The customer cannot change this color in the store; they can only select the size.
- Repeat for the next item.
Step 3: Publish the Lookbook
Once the configuration is complete, navigate to the Publish tab. Review your data and toggle the status to "Published" to make the look live in your webstore.
Note: If this is the first time you are configuring this product type, it requires additional setup in the CMS. You must ensure the Shop the look component is added to the Product Detail Page layout to correctly prepare and present the selection choices to the customer in the webstore.
See it in action
Want to see how a Lookbook works for the visitor in the webstore? Visit our demo store to see how curated sets simplify the buying process. View Demo: Barista outfit Lookbook