
Help Centre
How to configure a Copy Product
Sometimes, a single product appeals to very different customer groups, but you want to present it differently to each of them. In the PIM, you can achieve this without duplicating your stock levels.
While a standard product listing works for general items, it can be limiting when you need to target specific demographics. If you list a unisex beanie with a male model in the "Men's" category, female customers might scroll past it, assuming it isn't for them.
The Copy product solves this by allowing you to create a product that looks unique in the store—with its own name, description, and images—but is actually linked to an existing "Original" product behind the scenes. Instead of managing two separate inventories, you create a "marketing mask" for the original item.
The Copy product works on the simple logic of "Linking." The customer browses and buys the Copy product (e.g., "Women's Beanie"), but the system processes the order against the Original product (e.g., "Unisex Beanie"), ensuring stock is always accurate.
Why use a Copy product?
Using this product type allows you to maximize exposure for your inventory.
- Unisex Merchandising: You can sell the exact same physical item to two different demographics. You create one listing as "Men's Urban Beanie" and another as "Women's Cozy Beanie." They look like different products to the customer, but share the exact same stock.
- Inventory Synchronization: When a customer buys the "Copy," the stock is automatically deducted from the "Original." You never have to manage inventory in two places.
Step 1: Create the product and basic settings
The first step is to create the container for your new listing and link it to the source.
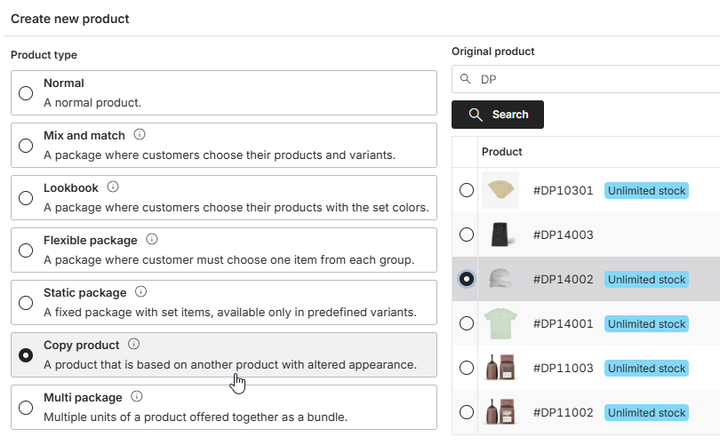
- Click "+ Create new product" in the top right corner of the product list.
- Select Copy product from the list of product types.
- Search for and select the Original product in the right-hand panel. This will immediately create the new product and copy all settings, variants, and prices from the original.
Once created, you need to configure the specific tabs to differentiate this "virtual" product from the original.
- In the Settings tab. The data is copied from the original, so you should update the Name to fit the new target audience (e.g., change "Unisex Cap" to "Summer Dad Cap").
- In the Variants tab. You cannot change or add anything here. The variants from the original product are simply mirrored for information only.
- In the Enrichment tab. This is the most important step. Upload unique media (e.g., a female model) and write a targeted description that differs from the original to appeal to the specific segment you are targeting.
- In the Categories tab. Assign the product to the specific category where this version belongs (e.g., "Women's Accessories"). Note: Categories are not copied from the original.
- In the Prices tab. The price is copied from the original, but you can update it if you wish to sell this version at a different price point.
Step 2: Verify the copy source
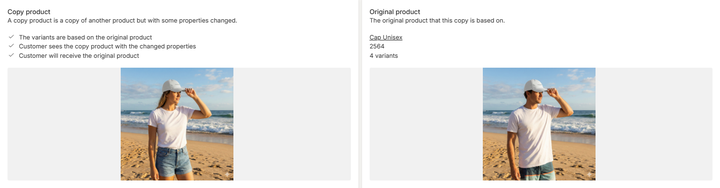
This is the technical step where you verify the connection to the physical stock. Navigate to the Package contents tab.
Since you selected the source during creation, the link is already established. The interface displays a comparison to help you verify the setup:
- Copy product: Shows the new properties you just created (what the customer sees).
- Original product: Shows the source product (what the customer receives and where stock is deducted).
Step 3: Publish the product
Once the configuration is complete, navigate to the Publish tab. Review your data and toggle the status to "Published" to make the product live in your webstore.
See it in action
Want to see how a Copy product works for the visitor in the webstore? Visit our demo store to see how the same physical item is listed as two unique products to appeal to different customers.